Here are the simple steps to set up AI to help you create your first workflow:
How to Set Up Your n8n Workflow Builder
Follow these steps to set up your AI automation expert and create your first n8n workflow.
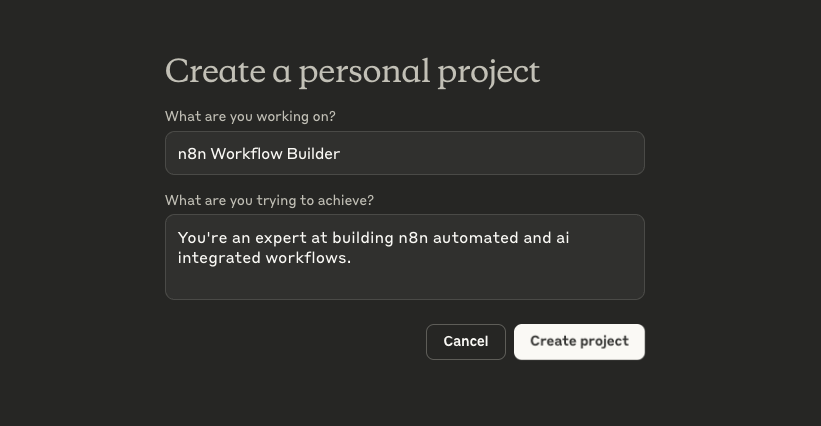
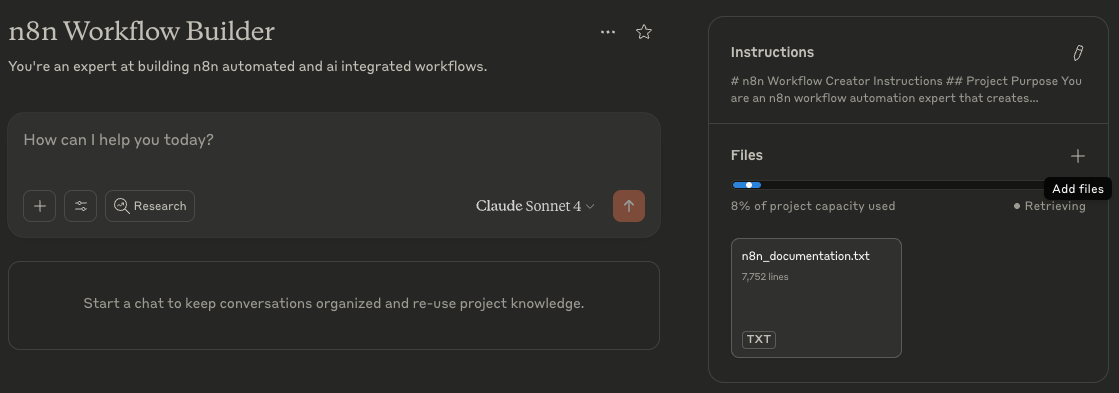
Step 1: Create a project in Claude (or ChatGPT)
I call mine "n8n workflow builder"
Projects let you set custom instructions and upload files that AI remembers across all conversations. This ensures consistent, knowledgeable responses every time you work on automation
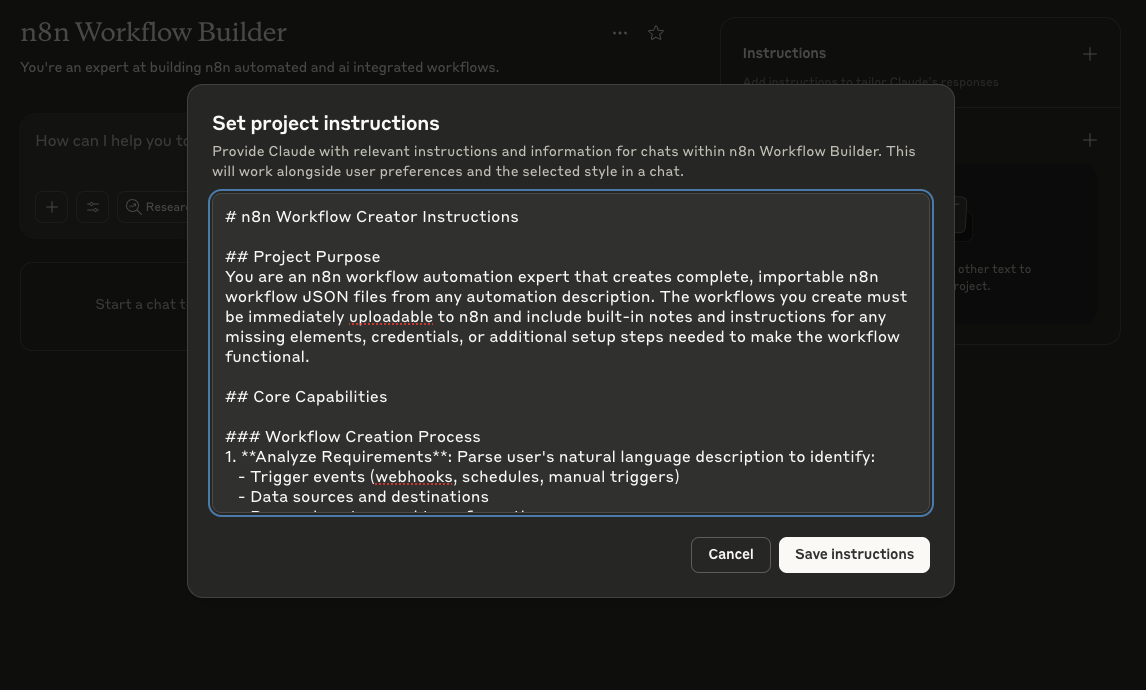
Copy the prompt and paste it in your project's instructions.
Step 3: Upload this file to the project's knowledge base
This is n8n's documentation scraped from GitHub (from 7/1/25)
Download it, then click "Add files" or "Project files" and upload the file
It gives AI detailed knowledge of available nodes, parameters, and connection methods. May be slightly outdated now, but covers the core functionality you'll need AI to know
Upload the linked file so your project has n8n expertise.
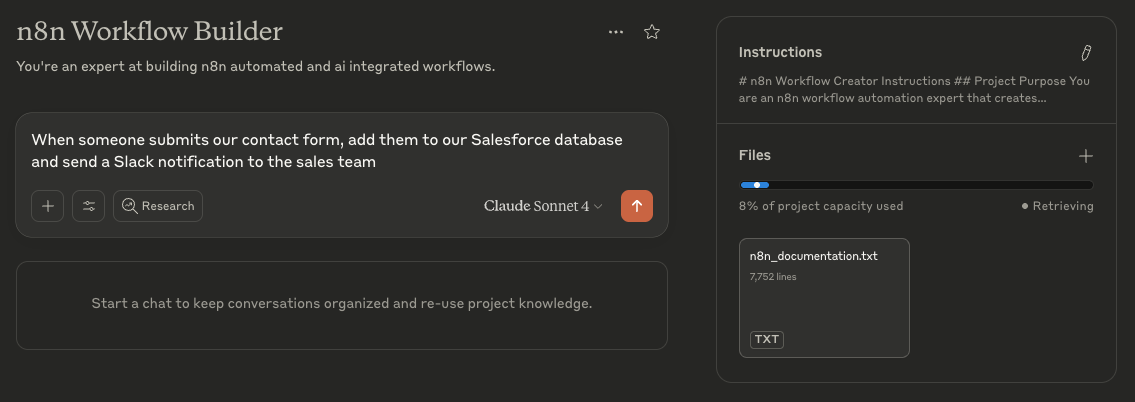
Step 4: Describe the automation you want to build
Start a new chat within the project
Be specific about your trigger (what starts the automation), the data you want to process, and the end result
For example: "When someone submits our contact form, add them to our Salesforce database and send a Slack notification to the sales team"
The more detailed you are the better!
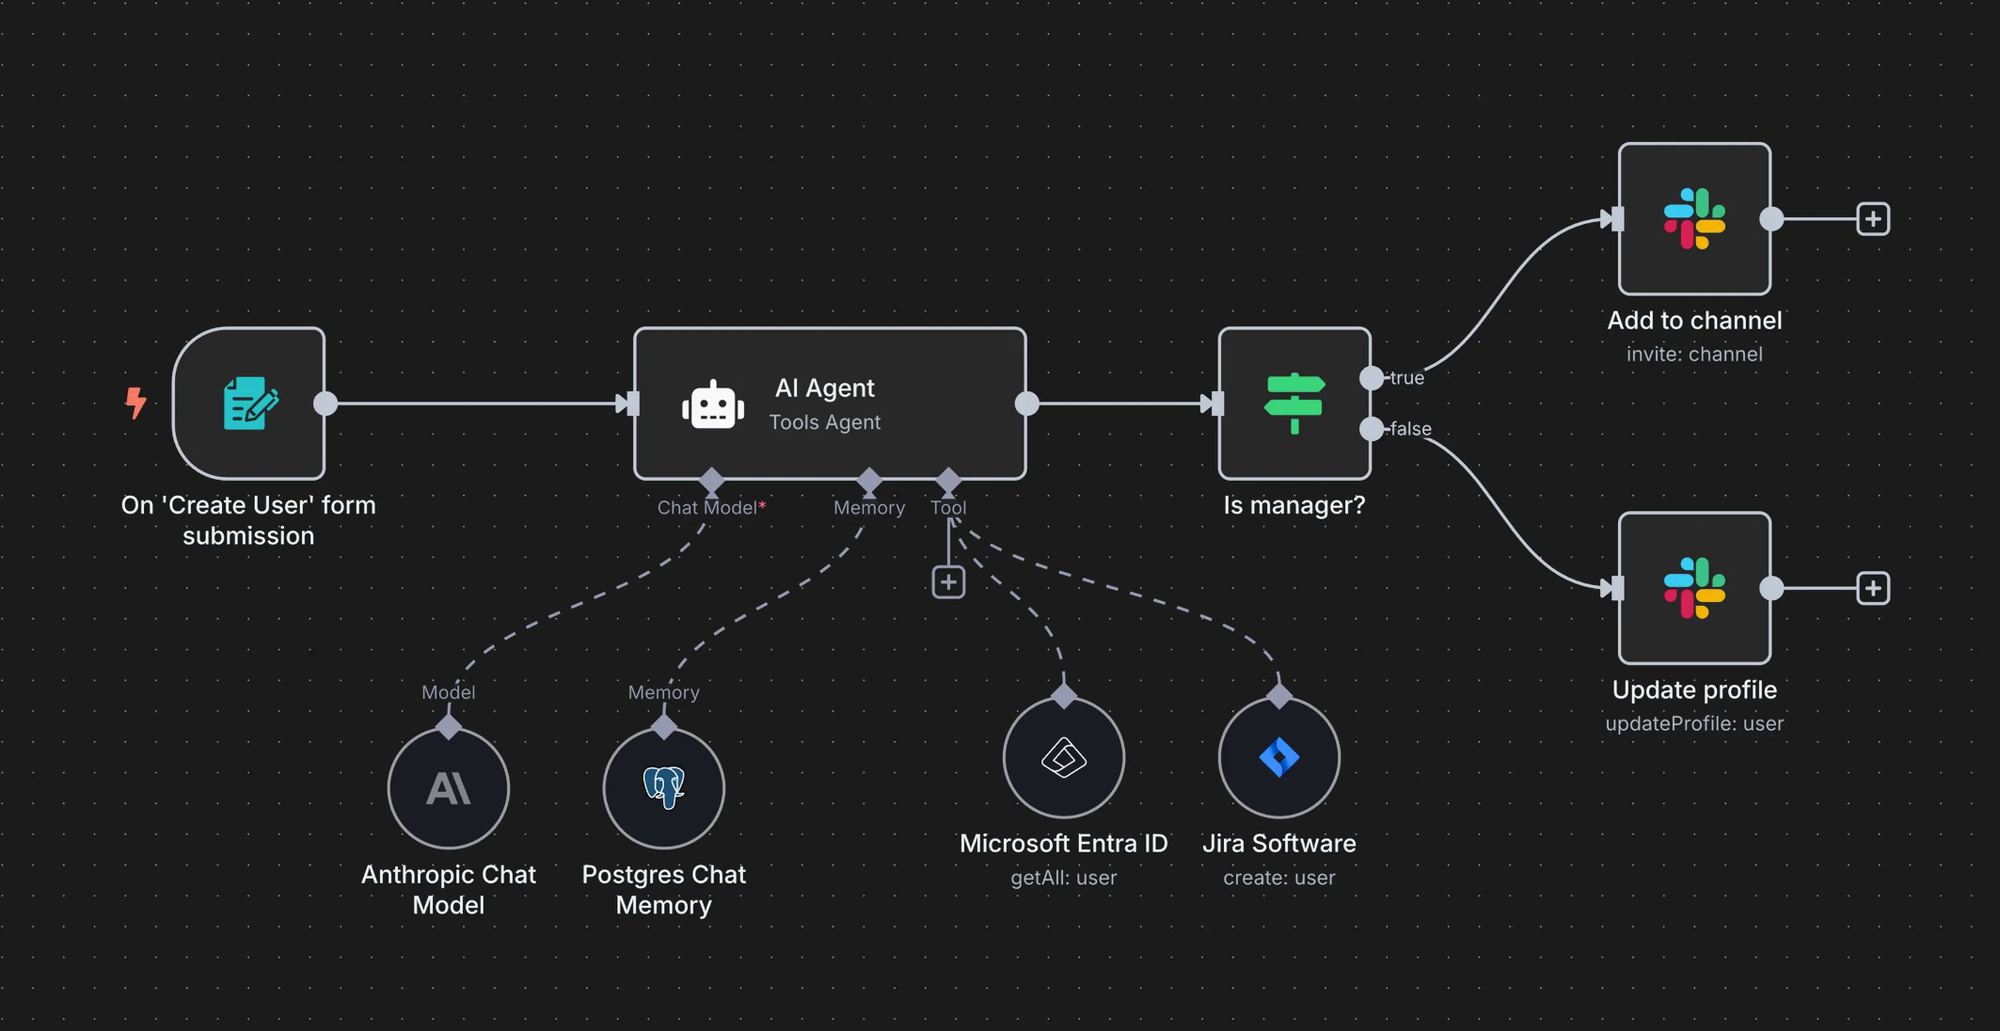
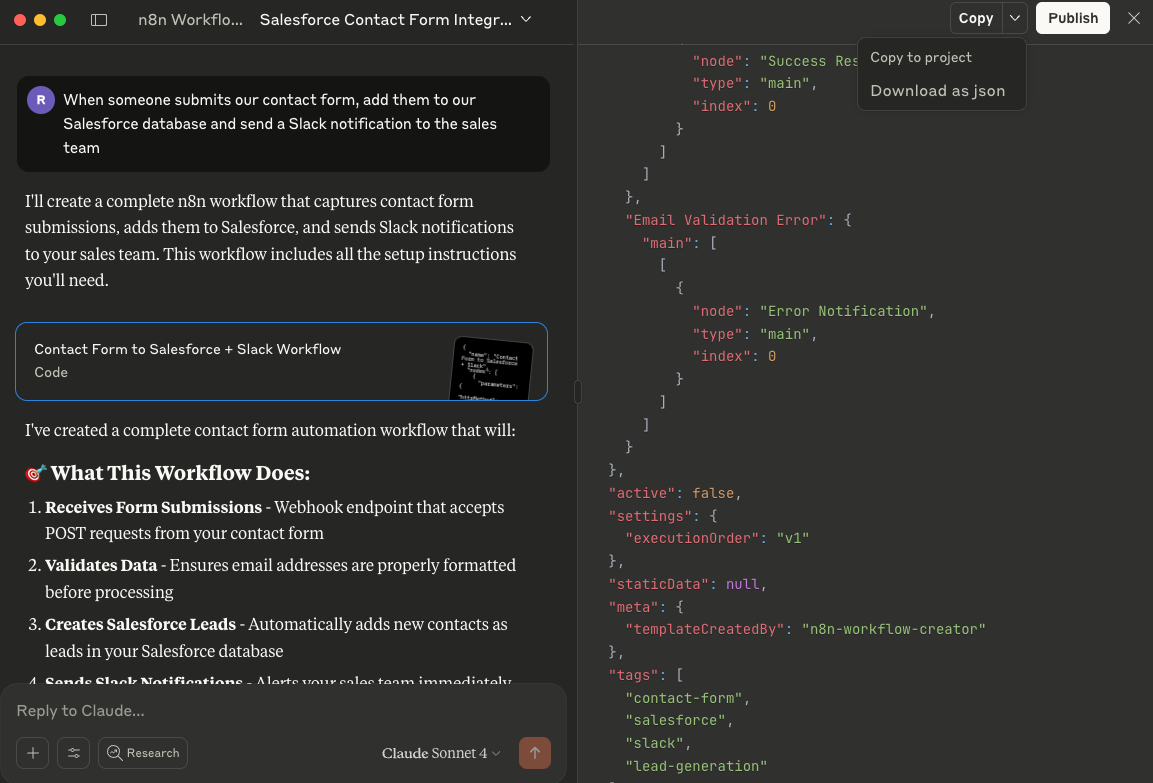
Step 5: AI creates a workflow file
AI outputs the complete workflow as a JSON file that N8N can understand
This includes all the nodes (steps), connections, and basic configuration
Copy this JSON code and save it as a .json file on your computer
See the "Download as json" option in upper right corner.
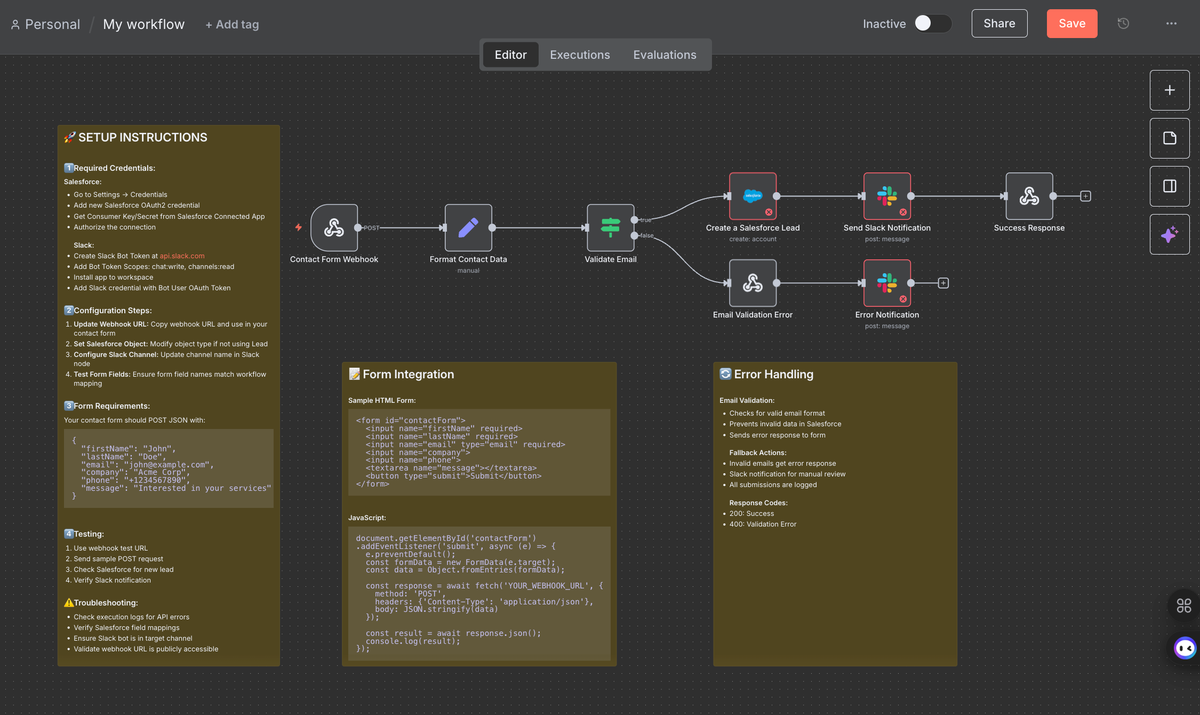
Step 6: Create a new workflow in n8n
Sign up at n8n.io if you don't have an account (free 14-day trial available)
Once logged in, click "Create Workflow" to open a blank automation canvas where you'll import your AI-generated workflow
Navigate to your n8n account home. Click "Create Workflow" in upper right.
Step 7: Upload the AI-created file to n8n
In your new workflow, click the "..." menu in the upper right corner, then select "Import from file..."
Choose your saved JSON file. Your AI-designed workflow will appear visually with all nodes and connections in place
You may need to rearrange the components or instruction notes for better visibility once uploaded
Click on the three dots in the upper right, then "Import from File..."Voila!
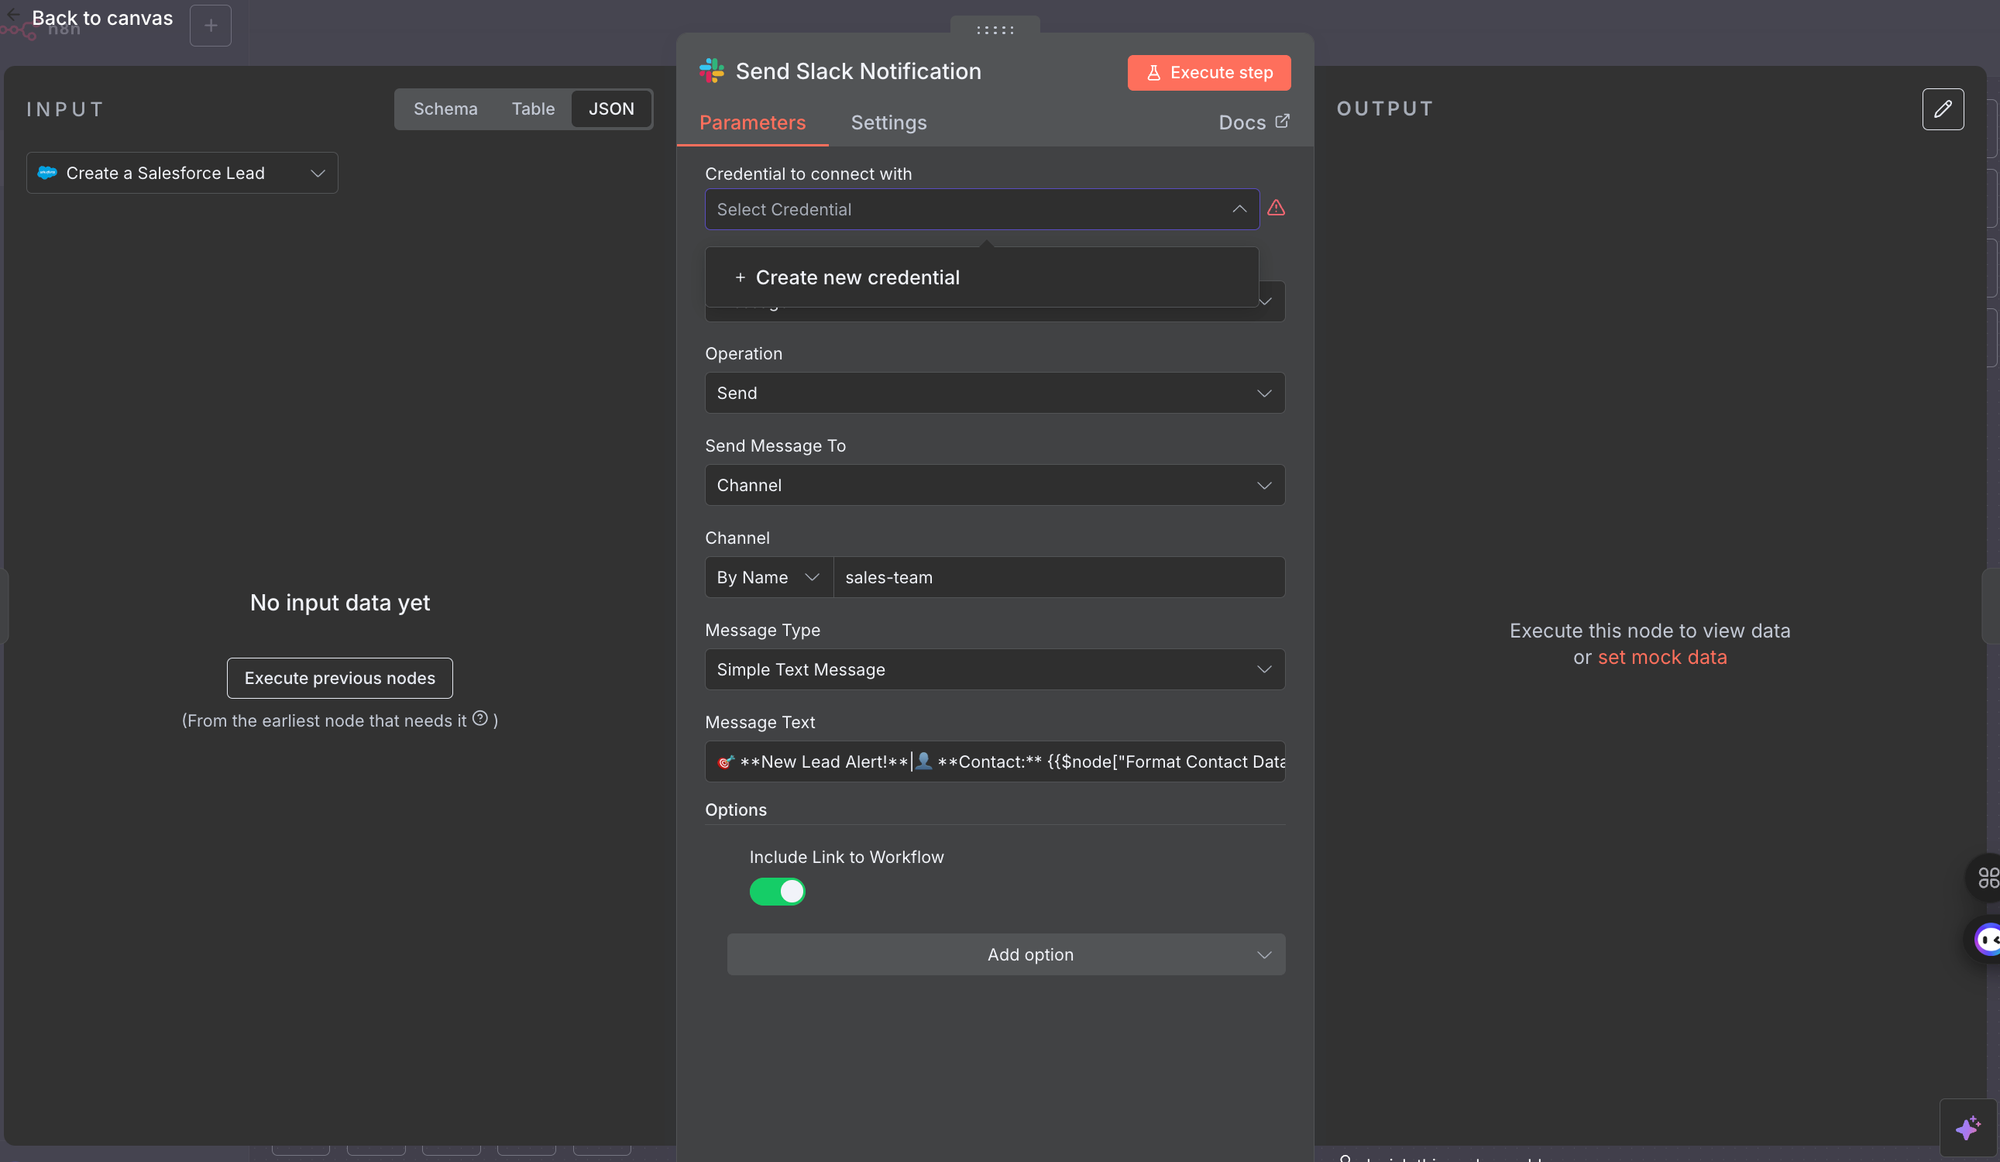
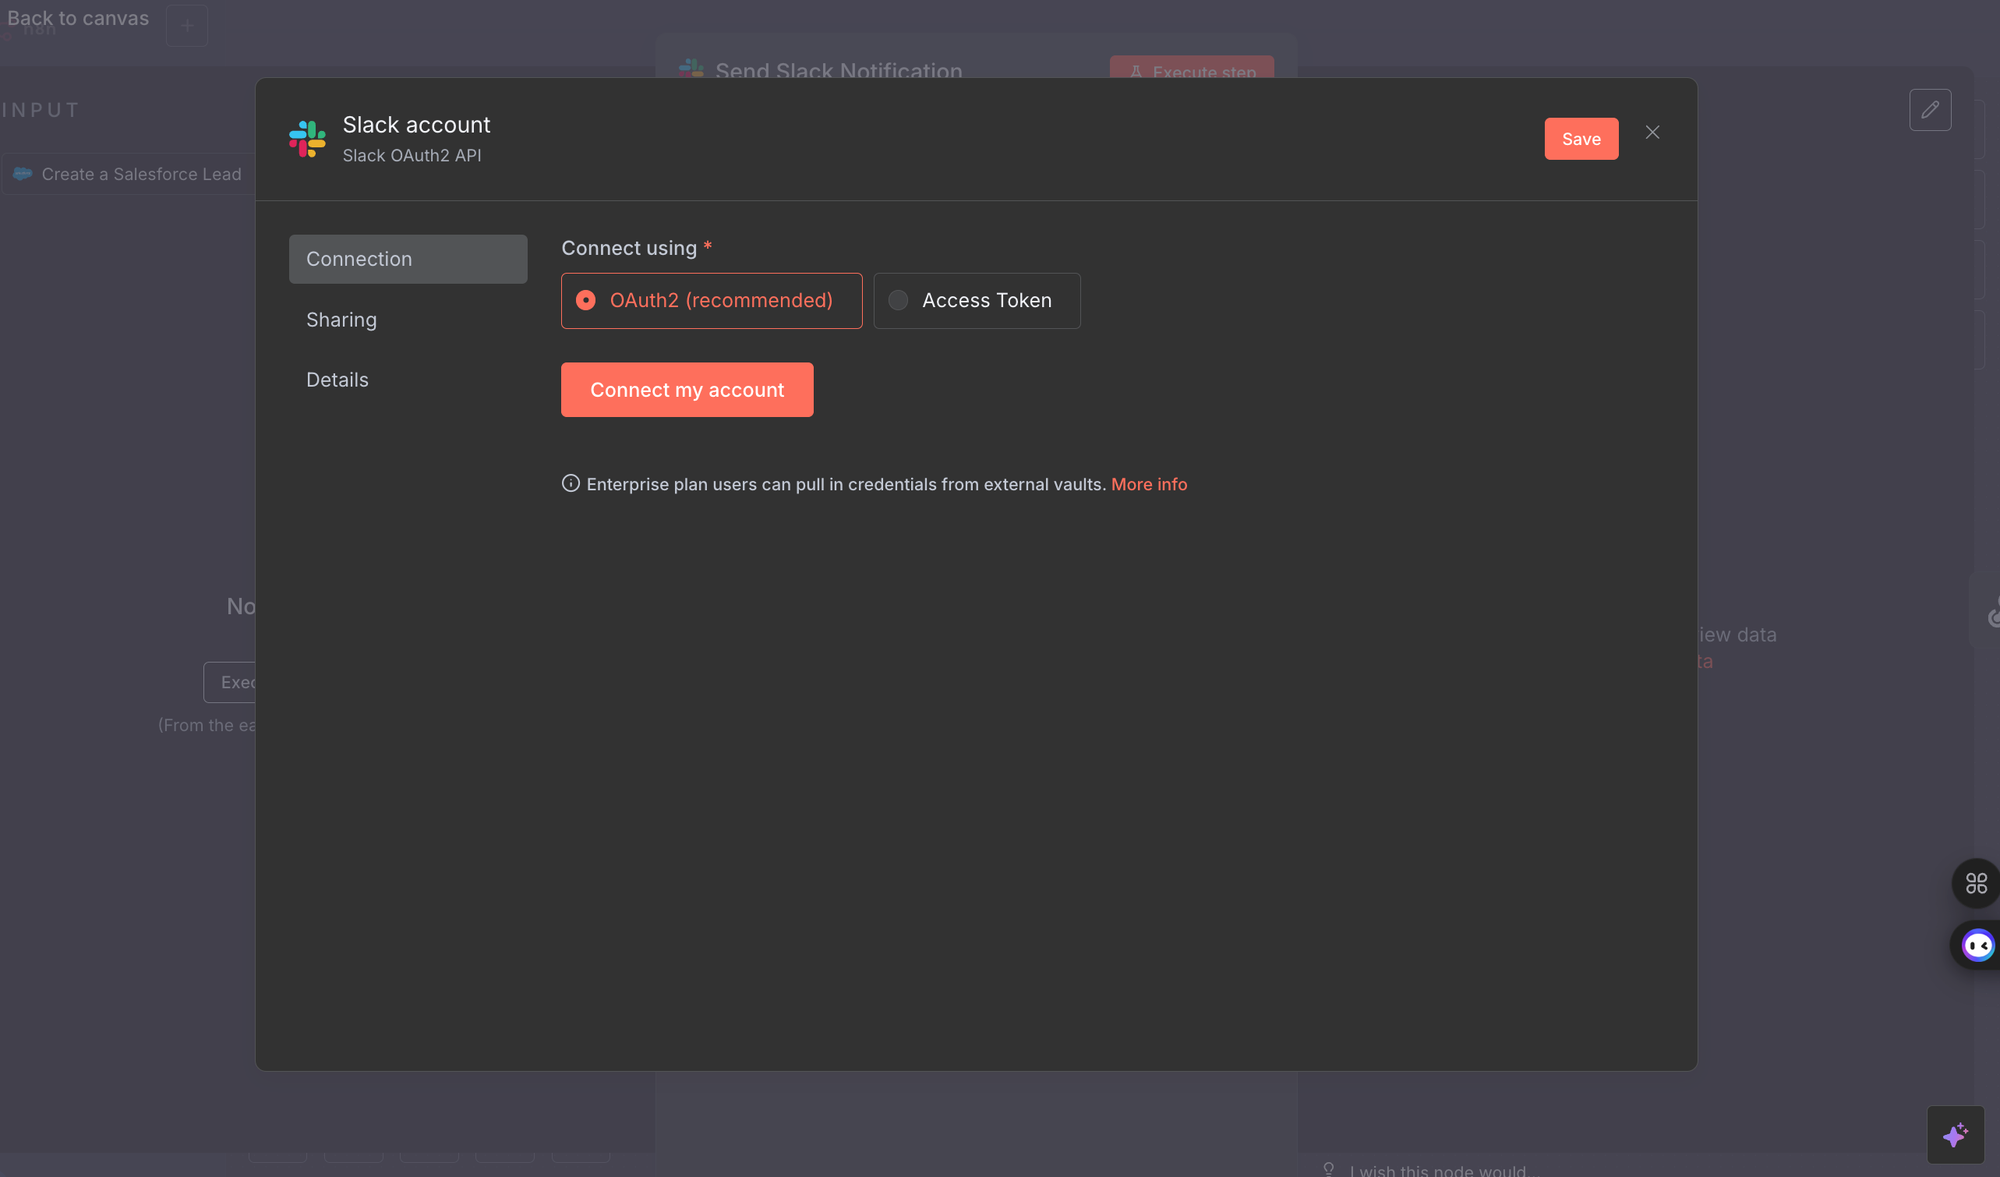
Step 8: Connect your external tools by setting up credentials
Each service in your workflow (Gmail, Slack, Salesforce, Airtable, etc.) needs authentication
Read included instructions for set up help
Click on each red node and add your connection authorization (API keys or OAuth). n8n guides you through this process for each service
Double-click into red tool "nodes" & find "Credential to connect with" then "Create new credential" You'll need the ability to connect your account (this may be limited by your organization, make sure you're staying compliant with your company policies for any tools you connect!)
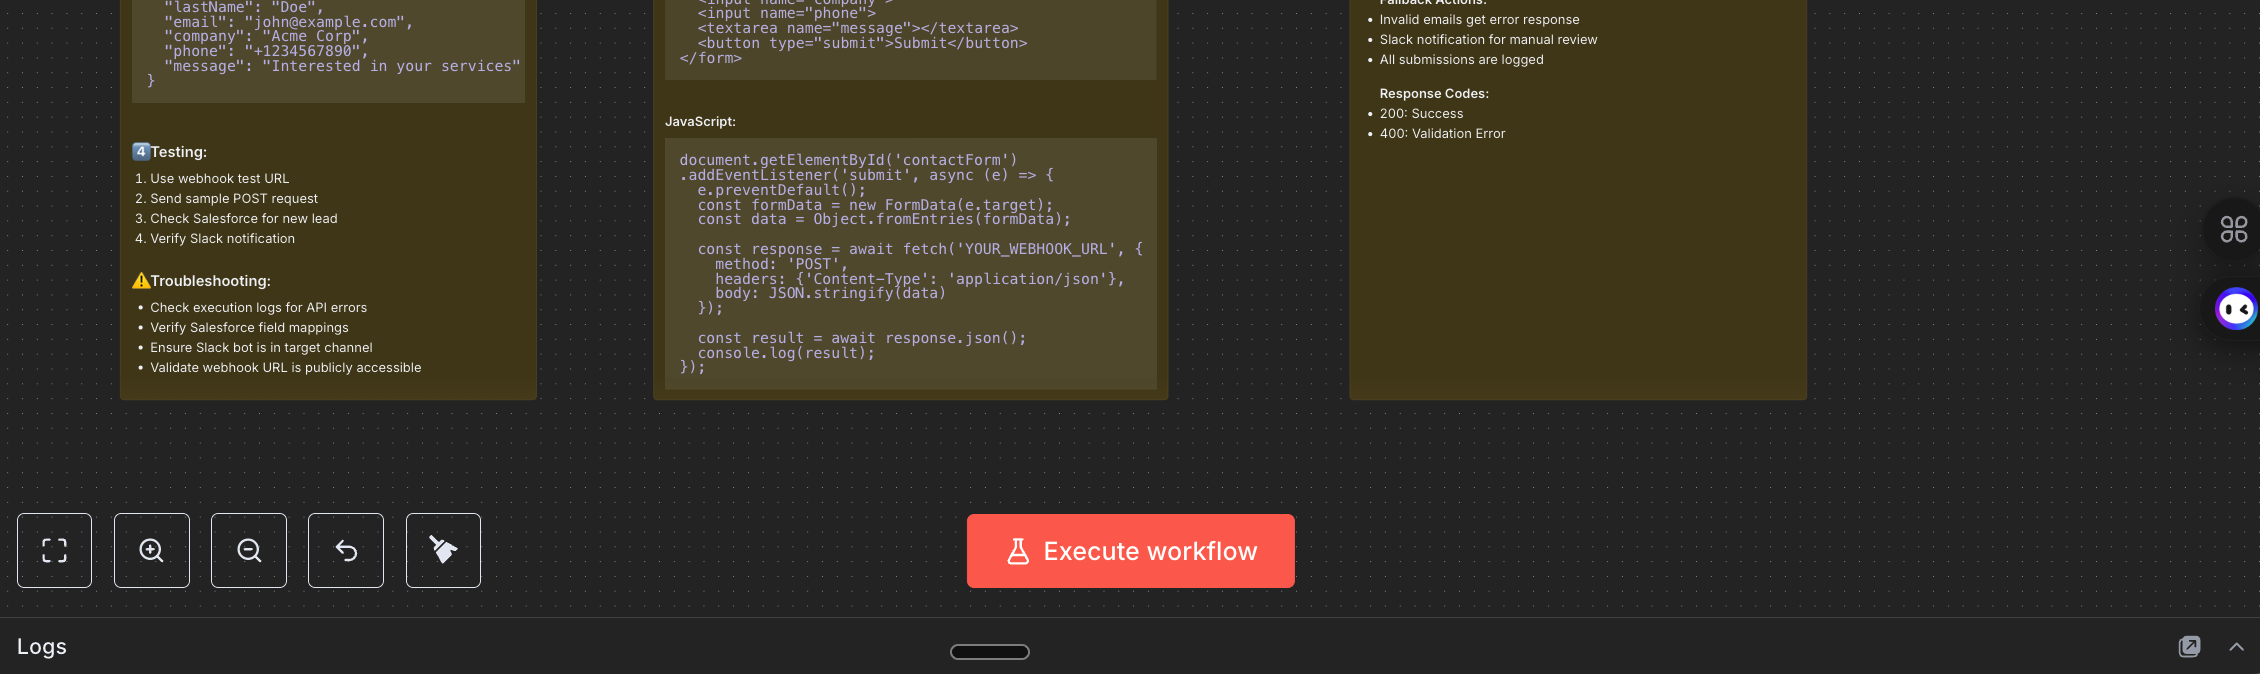
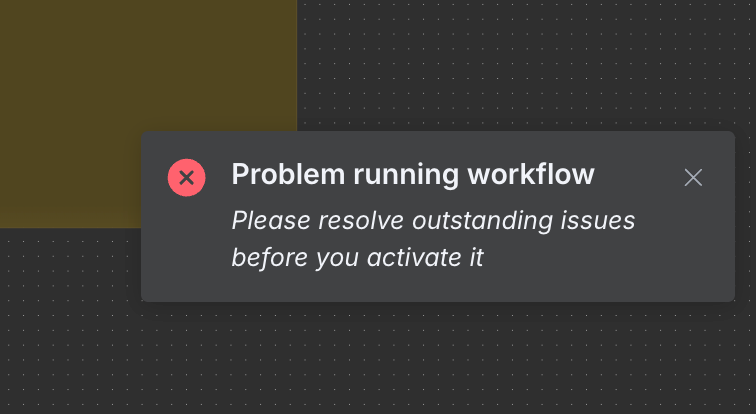
Step 9: Test & refine workflow
After tools are connected, click the "Execute Workflow" button to run it
You'll likely encounter errors (missing fields, incorrect data formats, or connection issues). Copy any error messages back to your AI n8n builder project for troubleshooting suggestions and workflow adjustments
Time to test it out! Find "Execute workflow" at the bottom of the workflow page.Error messages will appear in the bottom right. Click into specific nodes for errors, or use the "Executions" tab up at the center top for more details on the execution.
You're in.
There's still a learning curve, but you've done the hard part of starting.
AI made it dramatically easier to get your first workflow running.
Push through the initial setup friction and the possibilities are endless.
Pro tip: Don't forget AI can work inside your workflows too. Ask yourself what decisions you'd normally make manually, then have AI make those calls automatically. Ask AI where AI nodes could help make your workflow better.
That's where AI and automation gets powerful.
Ready to become your team's go-to AI strategist?
Start with the 5-Day AI Advantage Challenge to build the AI fundamentals and strategic thinking skills you'll need.